Wednesday, September 21, 2011

Gnocchi with Kale & Squash

I can't take any credit for this recipe, as I got it from the newest issue of Food Network Magazine.  But it was delicious and I had to share!  It was very quick and easy to make, full of flavor, and enough for dinner for 2 and some leftovers.  The only change I made was to add 1/2 an onion, diced, and I left out the sage, as it's not one of my favorite spices.

Ingredients

  • 2 tablespoons unsalted butter
  • 1/2 medium butternut squash, peeled, seeded and cut into 1/2-inch pieces
  • 3 cloves garlic, thinly sliced
  • 1 tablespoon roughly chopped fresh sage
  • 1/4 teaspoon red pepper flakes
  • Kosher salt
  • 1 1/4 cups low-sodium chicken broth or water
  • 1 bunch kale, stemmed and roughly chopped (about 8 cups)
  • 1 17.5-ounce package potato gnocchi
  • 3/4 cup grated parmesan or pecorino romano cheese

Directions
  1. Melt 1 tablespoon butter in a large ovenproof skillet over medium heat. Add the squash and cook, stirring, until slightly soft and golden, about 8 minutes. Add the garlic, sage, red pepper flakes and 1 teaspoon salt; cook until the garlic is soft, about 2 more minutes.
  2. Preheat the broiler. Add the chicken broth to the skillet. When it starts to simmer, stir in the kale and cook until it wilts slightly, about 2 minutes. Add the gnocchi, stirring to coat. Cover and cook until the gnocchi are just tender, about 5 minutes. Uncover and stir in 1/4 cup parmesan and the remaining 1 tablespoon butter. Sprinkle with the remaining 1/2 cup parmesan; transfer to the broiler and cook until golden and bubbly, about 3 minutes.

Friday, July 1, 2011

Pork Chops Stuffed with Bacon & Gouda

Yum.

That is all... really :)

This recipe came to my e-mail inbox from my daily recipe from Allrecipes.com and I included it in my meal plan this week cause the hubs loves gouda cheese. I use it whenever I get a chance. It turned out really good with a few variations that I've indicated below. I hope you enjoy!

Ingredients:
  • 2 ounces smoked Gouda cheese, shredded
  • 4 slices bacon, cooked and crumbled
  • 1/4 cup chopped fresh parsley
  • 1/8 teaspoon ground black pepper
  • 2 (2 1/4 inch thick) center-cut, bone-in pork chops
  • 1 teaspoon olive oil
  • 1/4 teaspoon salt
  • ground black pepper

Directions:
  1. Preheat an outdoor grill for medium heat.
  2. In a small bowl, combine the cheese, bacon, parsley, and 1/8 teaspoon black pepper.
  3. Lay the chop flat on cutting board, and with a sharp knife held parallel to the board, cut a pocket into the pork, going all the way to the bone, but leaving the sides intact.
  4. Stuff cheese mixture into pocket, and close with a wooden toothpick. Brush meat with oil, and season with salt and more black pepper.
  5. Lightly oil the grill grate. Grill over medium heat for 5 to 8 minutes on each side, or until pork is done. Careful not to overcook!
**I noticed after a few minutes that the cheese started to melt and ooze out so I seared in the grill marks and then finished off in the oven for about 15-20 minutes on 350 degrees to keep all the cheese contained.**


Tonight we paired with Pyramid IPA beer :) YUM! But Allrecipes.com recommends a Resiling and they are usually spot on with what they suggest. I hope you enjoy!

Cheers!
~Vino Vixen~

Thursday, June 23, 2011

Ground Turkey with Potatoes and Spring Peas

A friend of mine recently told me about a blog that I'm now in love with.  Do any of you follow skinnytaste.com??  All of their recipes are supposed to be relatively good for you and they look absolutely scrumptious.  This was the first one we tried and it was delishous!  My husband said it was a definite keeper.  We served it over white rice, but we could've made it a bit healthier using brown rice. :)  Gina posted this recipe on May 31, 2011.

Ingredients:
1 medium tomato
3 cloves garlic
1/4 cup fresh cilantro (I omitted this as I don't like cilantro & it was still tastey)
20 oz lean ground turkey (we used about 1lb)
4 medium scallions, chopped
1 cup fresh peas (I used frozen from Trader Joe's)
1 potato, peeled and diced into 1 inch cubes
8oz can tomato sauce
3/4 cup water
1/2 tsp cumin, or to taste (we omitted as my husband isn't a fan)
salt, to taste
1 bay leaf

Directions:
1. In a mini food processor or by hand, finely chop tomato, garlic, and cilantro.  I used my chopper from Pampered Chef and it was a cinch!

2. In a large skillet, brown turkey and season with salt and cumin to taste.  When meat is browned and cooked through add scallions, chopped tomato mixture, peas, potato, tomato sauce, water, cumin, salt, and bay leaf. Cover and simmer over medium-low heat until potatoes are cooked through, about 25 minutes stirring occasionally.  Add more water if needed.

3.  Remove bay leaf and serve over rice.

Enjoy!
Yankee Noodle

Pork with Spicy Orange Cranberry Sauce

This is a new recipe I tried in a cookbook for diabetics and it was amazing.  My husband was recently diagnosed as prediabetic borderline diabetic, so we've been trying to adjust how we both eat so that hopefully he won't need to take insulin for a good long while.  A friend and coworker of mine saw this book on clearance at B&N and picked it up for us.  This recipe was super easy and quick enough for a rushed weeknight after work.  Recipe is courtesy of Diabetic Holiday Recipes copyright 2010.

Ingredients:
1 tsp chili powder
1/2 tsp ground cumin
1/4 tsp ground allspice
1/4 tsp salt
1/4 tsp black pepper
4 boneless pork chops (about 1 pound)
1 tbsp canola oil
1 cup whole-berry cranberry sauce (I used the jellied sauce with no whole cranberries & it was just as good)
1/2 tsp grated orange peel
1/4 tsp ground cinnamon
1/8 tsp red pepper flakes

1. Combine chili powder, cumin, allspice, salt, and black pepper in small bowl; mix well.  Sprinkle evenly over both sides of pork chops.

2. Heat oil in large nonstick skillet over medium heat.  Add pork; cook 4-5 minutes on each side or until barely pink in center.

3. Combine cranberry sauce, orange peel, cinnamon, and red pepper flakes in a small bowl; mix well.  Serve sauce with pork chops.

Enjoy!
Yankee Noodle

Wednesday, June 15, 2011

Hoisin Pork Wraps

I'm digging my meal plan this week so I have lots to post I guess?! Some weeks are better than others :) This is another recipe from my Taste of Home Simple & Delicious magazine!

I wasn't going to post this recipe {even though I thought it was delish!} but when I put together my wrap, I couldn't resist snapping a picture of these beautiful colors! I hope you enjoy!


Ingredients:
  • 1 boneless whole pork loin roast (3 pounds)
  • 1 cup hoisin sauce, divided
  • 1 tablespoon minced fresh gingerroot
  • 6 cups shredded red cabbage
  • 1-1/2 cups shredded carrots
  • 1/4 cup thinly sliced green onions
  • 3 tablespoons rice vinegar
  • 4-1/2 teaspoons sugar
  • 15 flour tortillas (8 inches), warmed

Directions:
  1. Cut roast in half. Combine 1/3 cup hoisin sauce and ginger; rub over pork. Transfer to a 3-qt. slow cooker. Cover and cook on low for 7-8 hours or until pork is tender.
  2. Meanwhile, in a large bowl, combine the cabbage, carrots, onions, vinegar and sugar. Chill until serving.
  3. Shred meat with two forks and return to the slow cooker; heat through. Place 2 teaspoons remaining hoisin sauce down the center of each tortilla; top with 1/3 cup shredded pork and 1/3 cup coleslaw. Roll up.

As expected my husband didn't care for this one as much as I did. But luckily if the red cabbage cole slaw isn't your style you can easily just throw some cheese on the tortilla and adapt it for a whole different flavor!
Have I ever mentioned my go to website for wine pairings is www.winedin.com? I love it! But tonight it recomended a Reisling which is not my cup of tea, maybe it's yours?! Enjoy!

~Vino Vixen~

Monday, June 13, 2011

Baja Chicken Taco Pizza {and then some...}

I've really been wanting to utilitze my bread maker lately and what better way than to make some pizza crust dough! I have to say, this turned out awesome! I've made it by hand many times but it's never been like this.

I found this recipe CDKitchen.com but there are hundreds of similar recipes online.


Ingredients
  • 1 cup and 2 tbsp warm water
  • 2 tbsp oil
  • 3 cups bread flour
  • 1 tsp sugar
  • 1 tsp salt
  • 2 1/2 tsp active dry yeast
  • 1 tbsp pizza seasoning {not in the original recipe}

Directions
  1. Place ingredients in pan in order listed or as directed per machine instructions. Select white dough cycle.  
  2. When machine is finished, remove and form into crusts. Top with desired toppings and bake at 400 degrees F for 18-20 minutes or until crust is light brown.
Now, on to our "desired toppings." :)

I like to experiment with my homemade pizzas so this week I found the Baja Chicken Taco Pizza in my Simple & Delicious magazine. I also have to make a "regular" pizza for the hubs just in case he doesn't like my creations :) His usually includes a garlic alfredo sauce, mozzarella cheese, chicken, grilled onions and mushrooms. Topped with a little cheddar cheese.


Ingredients

  • 1 cup ranch salad dressing

  • 1/4 cup salsa

  • 1 tablespoon lime juice

  • 3 tablespoons minced fresh cilantro

  • 2 cups cubed cooked chicken breast

  • 1 envelope taco seasoning

  • 1 prebaked 12-inch thin pizza crust {obviously, I used the homemade version above}

  • 1/2 cup chopped tomato

  • 1/2 cup finely chopped red onion

  • 2 cups (8 ounces) shredded part-skim mozzarella cheese

  • 2 cups shredded lettuce

  • 2 medium ripe avocados, peeled and thinly sliced

  • Directions
    • In a blender or food processor, combine the salad dressing, salsa, lime juice and cilantro. Cover and process on high for 1-2 minutes or until smooth; set aside. In a small bowl, combine chicken and taco seasoning; set aside.
    • Place crust on an ungreased 12-in. pizza pan. Spread salsa mixture over crust. Sprinkle with the chicken mixture, tomatoes, onion and cheese. Bake at 425° for 17-20 minutes or until crust is golden brown and cheese is melted. Let stand for 10 minutes before cutting. Sprinkle with lettuce; top with avocado slices.
    Word to the wise... don't taste the sauce before it's cooked. It totally tastes weird and I thought I'd had a horrible recipe on my hands... it turned out SO good. Even my husband liked it and he doesn't usually care for recipes like this.

    I again paired it with chardonnay cause I had leftovers from last night. :)

    Cheers!
    ~Vino Vixen~

    Sunday, June 12, 2011

    French's Onion Chicken... twisted :)

    Tonight I did a twist on my French's Onion Chicken - I have to say, the original recipe {found on the back of the French's Onion can :) } is good to begin with. But this twist, is to die for - my husband says it's the best chicken ever. It's sort of a Chicken Cordon Bleu twist as well. I hope you enjoy!

    My original recipe can be found here. So it's essentially the same with a few minor changes :)

    Before you begin, pound out your boneless skinless chicken breasts till they are about a 1/4 of an inch thick. Layer one slice of your favorite white cheese {we've used provolone, swiss, monteray jack, or even just a white cheddar - they are all good} and then one slice of deli ham lunch meat. Roll chicken breast around the cheese and ham then secure with toothpicks.

    Then you just follow the recipe as in the original post.


    I served this tonight with a glass of Chardonnay {but that's pretty much my "go to" these days}. I think any white wine would do just fine :)

    Enjoy!
    ~Vino Vixen~

    Wednesday, June 8, 2011

    Chinese Beef with Broccoli

    This is better than takeout!  It's SO easy and tastes better than our local Chinese restaurant.  I used skirt steak instead of flank, because our store was out of flank steak.  It took about 30min to prepare and was plenty to feed 2 people with leftovers for lunch.  The original recipe is from FoodNetworkMagazine and I only made some slight changes - omitted the red peppers, used skirt steak instead of flank, and added a dash of cayenne at the end for some kick.


    Ingredients
    • 2 tablespoons cornstarch
    • 4 tablespoons soy sauce
    • 2 teaspoons sugar
    • 5 tablespoons peanut oil
    • 1 pound flank steak, thinly sliced against the grain
    • 1 tablespoon oyster sauce
    • 1 1/4 cups low-sodium chicken broth
    • 4 thin slices peeled ginger
    • 1 head broccoli, cut into florets
    • 1 large onion, halved and sliced 1/2 inch thick
    • 3 plum tomatoes, quartered lengthwise
    • 2 cloves garlic, minced
    • Cooked white rice, for serving (optional)
    Directions
    1. Whisk 1 tablespoon cornstarch, 3 tablespoons soy sauce, 1 teaspoon sugar and 1 tablespoon peanut oil in a large bowl. Add the steak and toss to coat; refrigerate until ready to cook.
    2. Whisk the remaining 1 tablespoon each cornstarch and soy sauce, the oyster sauce and chicken broth in a small bowl; set aside.
    3. Heat 1 tablespoon peanut oil in a large skillet over high heat. Add the ginger, broccoli and the remaining 1 teaspoon sugar and stir-fry 3 to 4 minutes; transfer to a plate. Heat 1 more tablespoon peanut oil in the skillet, add the onion and stir-fry 2 to 3 minutes. Add the tomatoes and cook, turning gently, 2 minutes. Transfer the onion and tomatoes to the plate with the broccoli.
    4. Reduce the heat to medium high; add the remaining 2 tablespoons peanut oil to the skillet. Add the garlic and steak and stir-fry 1 minute. Whisk the sauce mixture, then add to the skillet and simmer 1 minute. Return the vegetables to the skillet; cook until the meat is cooked through, 3 to 4 minutes. Serve with rice, if desired.
    This picture is from the FoodNetworkMagazine website, it's not my original image.

    - Pastry Princess

    Tuesday, June 7, 2011

    Aloha Pork Chops

    Oh this is a good one people! A little bit Hawaiian, a little bit just pure yummy! I hope you enjoy!


    Ingredients 

  • 1 tablespoon lemon-pepper seasoning


  • 4 boneless pork loin chops (3/4 inch thick)


  • 1 teaspoon plus 2 tablespoons olive oil, divided


  • 1 cup sweet-and-sour sauce


  • 1 can (20 ounces) pineapple chunks, drained


  • 1/2 medium green pepper, julienned


  • 1/2 cup chopped red onion


  • 6 cups cold cooked rice

  • 1/4 cup stir-fry sauce


  • Directions:
    1. Sprinkle pork chops with lemon-pepper. In a large skillet, brown chops on both sides in 1 teaspoon oil over medium-high heat; remove and set aside. Drain skillet; add sweet-and-sour sauce and pineapple chunks. Bring to a boil. Reduce heat; return chops to skillet. Simmer, uncovered, for 5 minutes or until meat juices run clear. 
    2. Meanwhile, in another skillet, saute the green pepper and onion in remaining oil for 2 minutes. Add rice and stir-fry sauce; cook and stir for 4 minutes or until lightly browned. Transfer to a serving platter; top with pork chops.
    We're enjoying this tonight with a little bit of Rosemount Shiraz Cab... its yummy!

    Cheers!
    ~Vino Vixen~

    Thursday, June 2, 2011

    Angel Chicken Pasta

    This is a recipe that I've had in my book for what feels like forever now, and I've always been afraid to try it.  I even bought all the ingredients... and didn't make it for nearly three more weeks, until there was nothing else in the house to cook for dinner.  And boy do I regret that, because it was delicious!  We were a little disappointed that there weren't quite enough leftovers for a second dinner, but with a few alterations, you could change that easily enough.


    Angel Chicken Pasta, adapted from allrecipes.com
    Ingredients:
    2 - 3 chicken breasts, halved (or more, if you need to serve more people)
    ¼ cup butter
    1 pkg dry Italian-style salad dressing mix (.7 ounce)
    ½ cup white wine (I used chardonnay this time)
    1 can condensed golden mushroom soup (10.75 ounce)
    4 oz cream cheese with chives (I used cream cheese with chives and onions, since that's what our store had)
    1 lb angel hair pasta, or any pasta of your choice (I think we only cooked 1/2 lb, and it was more than enough to go with the amount of sauce we had)
    Directions:
    Melt the butter in a fairly large saucepan, using low heat. Stir in the dressing mix. Once it's at a good consistency, add the wine and the soup. Break or scoop the cream cheese into small pieces and mix in, heating just until it's melted and the mixture is smooth. If you find that it's rather thick, try adding milk an ounce at a time until you achieve the desired consistency.
    Put the chicken breast halves in a glass baking dish (9x13 or 2.5 qt), pour the sauce over them, and bake for an hour. While it's cooking (towards the end), boil your pasta and drain it.  Add a piece of chicken and some sauce to a plate of pasta, and enjoy!


    This dish can taste a bit salty, so I'd recommend some fresh green veggies as a side, such as grilled zucchini or steamed broccoli, or a nice salad.

    Thursday, May 26, 2011

    Vanilla Swiss Meringue Buttercream

    I've recently discovered a new talent of mine in making delicious cakes and decorating them in fondant.  I recently made one for my BFF's baby shower and tried out a new icing recipe as I'm not a huge fan of American buttercreams.  A fellow baker friend of mine recommended I try a Swiss Meringue buttercream and boy was she spot on.  While this icing does take a little extra time to make, it is worth the effort and then some.  It came out so creamy and smooth I couldn't stop taste testing and licking the spoon!  Enjoy. :)

    Recipe courtesy of Annie's Eats blog.

    Vanilla Swiss Meringue Buttercream
    5 large egg whites
    1 cup plus 2 tbsp sugar
    pinch of salt
    1 lb (4 sticks) unsalted butter, at room temperature
    2 tsp. vanilla extract

    Directions:
    1. To make the frosting, combine the egg whites, sugar, and salt in a heatproof bowl set over a pot of simmering water. Heat whisking frequently, until the mixture reaches 160F and the sugar has dissolved.

    2. Transfer the mixture to the bowl of a stand mixer fitted with a whisk attachment.  Beat on medium-high speed until stiff peaks form and the mixture has cooled to room temperature, about 8 minutes.

    3. Reduce the speed to medium and add the butter, 2 tablespoons at a time, adding more once each addition has been incorporated.  If the frosting looks soupy or curdled, continue to beat on medium-high speed until thick and smooth again, about 3-5 minutes more. 

    4. Stir in the vanilla extract and mix just until incorporated.  Tint with gel icing color as desired.

    Makes about 5 cups of frosting.

    Mmmm, enjoy licking the spoon!
    Yankee Noodle

    Cupcakes are my favorite!

    I threw a baby shower at work for two coworkers. It went great! I made cupcakes and thought I would share.
    The actual cake part was just out of the box butter recipe or chocolate fudge. I had to save time as I made 4 batches!
    However, the icing is my mom's buttercream icing which I love.
    For one batch ingredients:
    1 and 1/2 boxes of 10X sugar
    1 tsp. vanilla
    1/4 cup vegetable shortening (I'm guessing, I eye bawl it. It is like a heaping spoon glob really.)
    1/2 cup butter or margarine (Again this is a guess, I use 2 "globs" of tub margarine.)
    1-2 tablespoons of milk (eye bawl for the consistency that you want.)

    If it is too sweet add a little shortening, if it is too think, add butter or milk. Play with it and keep taking it until it is the sweetness you want. If you get it too runny, then add a little sugar or shortening. It usually tastes good no matter what!

    Add color or not.

    I use one of the Wilton's cupcake tips to ice them. It makes them pretty and so easy!

    Here are the cupcakes I made for the shower!


    Tuesday, May 24, 2011

    Vanilla Buttermilk Cake with Italian Meringue Buttercream

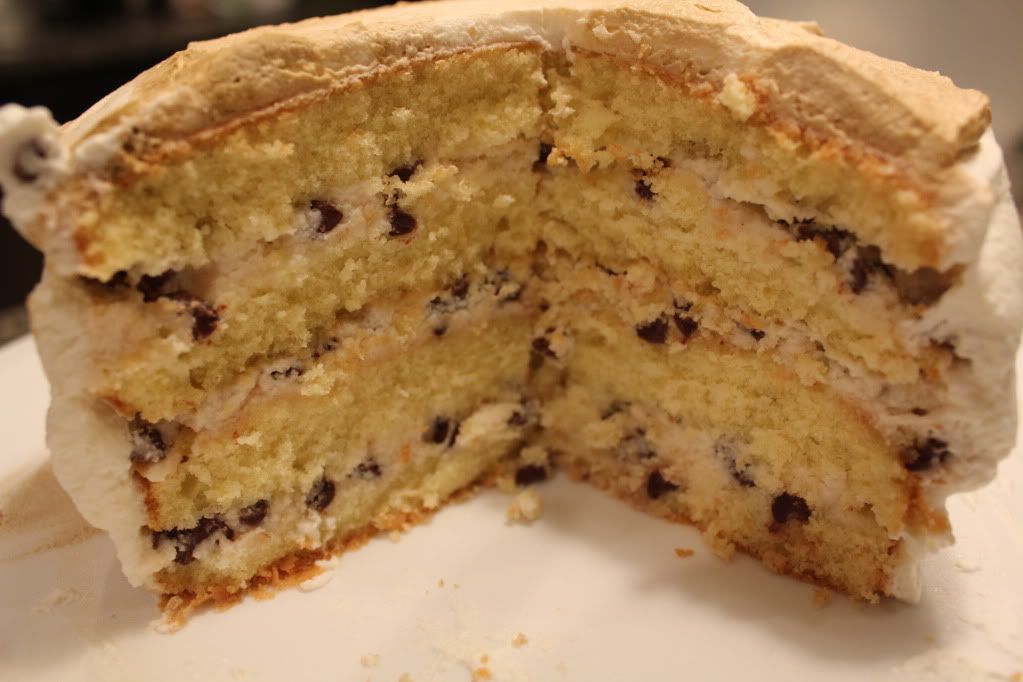
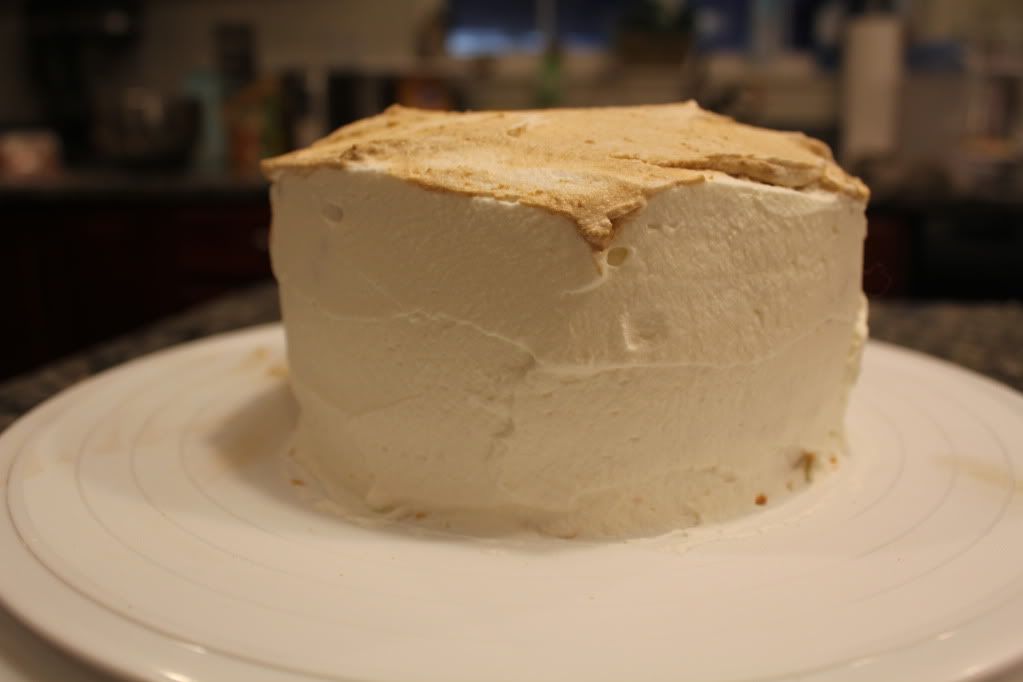
    I made this for a wedding cake I made this weekend, everyone loved it. This might be one of the best yellow cakes I've ever tried, it light, buttery and moist.
    Vanilla Buttermilk Cake 
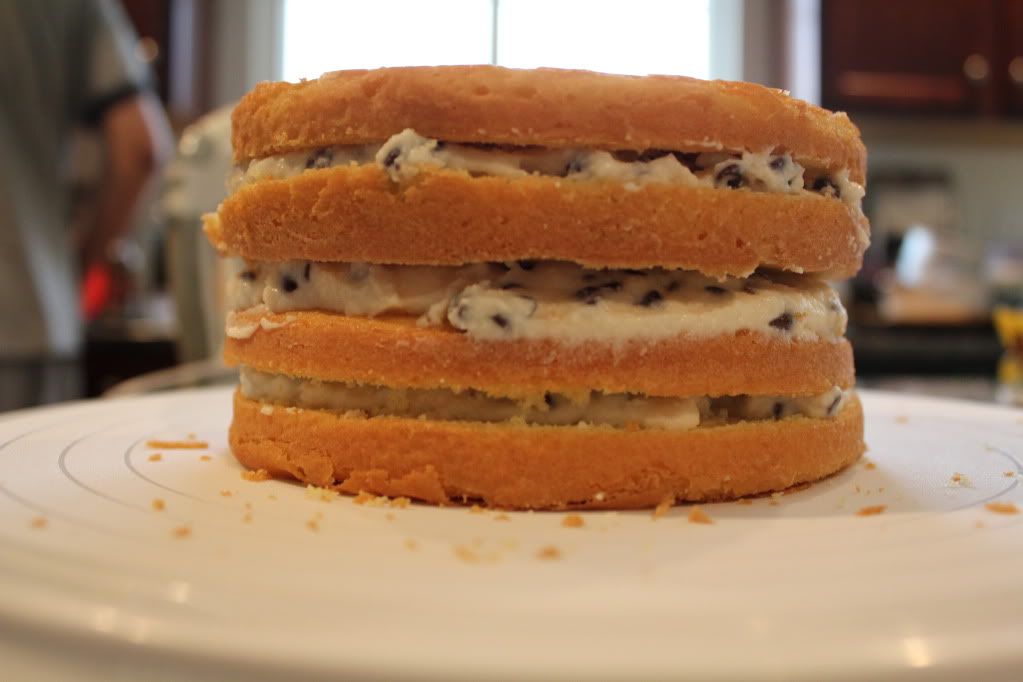
    Makes one three-layer 9-inch round cake 

    3 3/4 cups cake flour
    2 1/2 cups sugar
    1 tablespoon plus 2 3/4 teaspoons baking powder
    1/2 teaspoon salt
    2 1/2 sticks (10 ounces) unsalted butter, at room temperature
    1 1/4 cups plus 1/3 cup buttermilk
    5 whole eggs
    2 egg yolks
    2 1/2 teaspoons vanilla extract
    1. Preheat the oven to 325°F. Butter three 9-inch round cake pans. Line the bottom of each pan with a round of parchment or waxed paper and butter the paper.
    2. Combine the cake flour, sugar, baking powder, and salt in a large mixer bowl. With the mixer on low speed, blend for 30 seconds. Add the butter and 1 1/4 cup of the buttermilk. Mix on low speed briefly to blend; then raise the speed to medium and beat until light and fluffy, 2 to 3 minutes.
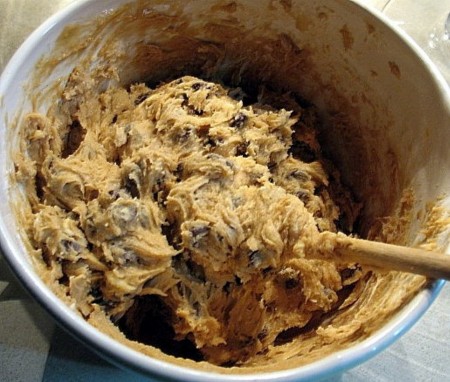
    3. In a smaller bowl, whisk together the whole eggs, egg yolks, vanilla, and the remaining 1/3 cup buttermilk until well blended. Pour one-third of the egg mixture into the cake batter at a time, folding it in completely after each addition. There will be 9 cups of batter; our 3 cups batter into each pan.
    4. Bake for 26 to 28 minutes, or until a cake tester or wooden toothpick inserted in the center comes out clean.
    5. Turn the layers out onto wire racks by placing a rack on top of a pan, inverting it, and lifting off the pan. Peel off the paper liners and let cool completely.
    While cake is baking, you can start preparing the buttercream. I love using Italian Meringue Buttercream because it light & fluffy, has less sugar then traditional (american) buttercream and decorator frosting. I am not going to lie, at first I was intimidated by the thought of making meringue and adding hot sugar but if you have a standmixer it's so easy!

    Italian Meringue Buttercream
    5 eggs whites (large)
    10 ounces (1 1/4 cups) extra-fine granulated sugar, divided
    1/4 cup water
    1 pound (4 sticks) unsalted butter, soften
    -candy thermometer & standmixer with whisk attachment would be helpful

    1. Separate the eggs and place the whites in the bowl of the standing mixer fitted with a wire whip attachment. Reserve the yolks for another use.
    2. Measure 1 cup of the sugar into a heavy-bottomed 1-quart saucepan with 1/4 cup water. Gently stir to combine; I use the candy thermometer for this. Leave the candy thermometer in the saucepan, numbers facing down to balance the thermometer.
    3. Measure the 1/4 cup sugar into a small bowl and set aside.
    4. Cut the butter into tablespoon-size pieces and set aside in a medium bowl.
    5. Begin making the sugar syrup. Place the saucepan with the sugar and water over medium-high heat. Partially cover with a lid to capture the evaporating water -- this helps to moisten the sides of the saucepan to prevent sugar crystals separating from the syrup.
    6. Begin whipping the egg whites to stiff peak in a standing mixer fitted with the wire whip attachment set to high speed. When the whites are at stiff peak you have a meringue. Keep the mixer running and pour the 1/4 cup of sugar into the meringue.
    7. Raise the heat to bring the syrup to 245 degrees if it is not there already. When the syrup is at 245 degrees, remove the thermometer.
    8. Slowly pour the syrup into the meringue when pouring, keep your eye on the bowl. Aim for the space between the mixer bowl and the revolving wire whip. To maintain the same rate of pouring, pour slowly and raise the saucepan from your shoulder. Twisting at the wrist or elbow tends to throw off my aim.
    9. After 1 to 2 minutes reduce the speed to medium for about 3 to 4 minutes or until the meringue is cooled.
    10. Add the butter one tablespoon at a time. Increase the speed to high for one to two minutes to fully combine the butter with the meringue.
    11. At this point, flavorings can be added to the base recipe for Italian meringue buttercream, below is an example of the amount of flavoring to add to the buttercream.
    -1 teaspoon vanilla extract or any extract (almond, orange, etc.)
    -1/2 cup bittersweet chocolate, melted
    -2 to 4 tablespoons (to taste) dark rum
    -2 to 4 tablespoons (to taste) amaretto/coffee
    -1/4 to 1/2 cup raspberry puree

    -2 tablespoons lemon liqueur (lemoncello)
    -1 teaspoon orange oil
    -1 teaspoon lime oil

    Saturday, May 21, 2011

    Chocolate Chip Cookie Dough Cookies


    Ingredients:

    2 Cups all purpose flour
    1/2 tsp baking soda
    1/2 tsp salt
    3/4 cup unsalted, butter
    1 cup brown sugar
    1/2 cup white sugar
    1 tbsp vanilla
    1 egg
    1 egg yolk
    2 cups semi-sweet choc. chips

    Directions:

    Preheat to 325 degrees and prepare cookie sheets. In a small bowl, combine flour, baking soda, and salt. In a larger bowl, combine butter, sugars, and vanilla. Beat in egg and egg  yolk until creamy. Add dry ingredients until blended and stir in chocolate chips by hand. Drop cookie dough 1/4 cup at a time onto prepped cookie sheets. Use only about 3/4 of the prepared dough. They should be dropped at least 3 inches apart. Bake for 10 minutes and remove. Add remaining dough to the center of each half baked cookie and put back in oven. Bake for another 5-6 minutes or until edges are lightly browned. Cool on baking sheet and transfer to wire rack.

    Source: All recipes.com (but modified to my taste)

    Tasty Blessings!
    Heaven & Honey

    Wednesday, May 18, 2011

    Cannoli Cake

    This cake was absolute heaven!  Since my daughter's first birthday I have become a cake making enthusiast.  I love to bake and design things and found working with fondant was rather fun.  I made my daughter's 1st birthday cake and after it turned out so well, I decided to try my hand at making more cakes for practice.  When my friend told me she was having a baby I offered to make her baby shower cake to practice my new hobby and she was ecstatic.  She is Italian and requested cannoli filling in her cake if I could manage it.  Well, I did even better and found a whole cake flavored like a cannoli!  Due to all the cream and ricotta in the filling and whipped frosting, I stored this cake in the fridge and I have to say that it tasted even better after a day in the fridge. 
    My daughter's cake- my 1st attempt at fondant!
    I'll be making her formal baby shower cake this weekend in the shape of a puppy.  The pictures here are of the test cake complete with brown dye fail on the top of the cake.  This whipped frosting disintegrated when mixed with food color gel, so I will be using a Swiss buttercream on the outside of the cake before covering in fondant.  If you don't need to tint the frosting the whipped frosting in this recipe was absolute heaven! 
    Recipe is courtesy of http://www.sargento.com/.

    Ingredients
    • 4 eggs (it's best if eggs are at room temp before adding sugar)
    • 2/3 cup sugar
    • 1 cup all-purpose flour
    • 1/2 cup (1 stick) butter or margarine, melted and cooled
    • 1/4 cup chopped semisweet chocolate
    • 1 recipe Ricotta Filling
    • 1 recipe Whipped Cream Frosting
    • Fresh berries or candied cherries, for garnish

    Ricotta Filling:

    • 2 cups (15 oz.) Sargento® Part-Skim Ricotta Cheese
    • 3 Tbsp. sugar (I actually added double the sugar to get the filling a bit sweeter, but I have a huge sweet tooth!)
    • 1-1/2 tsp. vanilla
    • 1 cup whipping cream, whipped
    • 1 cup semisweet mini chocolate chips

    Whipped Cream Frosting:

    • 2 cups whipping cream
    • 2 Tbsp. confectioners sugar
    • 1/2 tsp. vanilla
     Directions
    1. Beat eggs and sugar on medium speed in bowl with an electric mixer 5 minutes or until thick. Gently fold in flour and butter; pour into greased and floured 8-inch round cake pan. Bake in preheated 350°F oven 40 minutes or until cake feels firm when touched in center. Cool in pan 5 minutes. Remove from pan and cool completely on wire rack.
    2. To make Ricotta Filling: Beat Ricotta cheese, sugar and vanilla on medium speed in bowl with electric mixer 3 minutes. Fold in whipped cream and chocolate chips.
    3. To make Whipped Cream Frosting: Beat cream on high speed in bowl with electric mixer until soft peaks form. Beat in sugar and vanilla.
    4. Cut cake in half horizontally using sharp serrated knife. Cut each layer in half again horizontally. Place 1 layer on serving platter; spread with one-third Ricotta filling. Repeat procedure, ending with cake layer. No sooner than 6 hours before serving, frost sides and top of cake with all but 1 cup frosting. Decorate with remaining frosting, chopped chocolate and fruit. Refrigerate until serving time.  

    Tuesday, May 17, 2011

    BBQ Chicken Cobb Salad

    Cobb salad??? Easy peasy, who doesn't know how to make a cobb salad??? Well, apparently some people need a recipe. I got this recipe in my weekly e-mail from Allrecipes.com and it made my mouth water just looking at the colorful picture. I'm happy to report... mine came out looking equally as yummy :) Hope you enjoy!


    Ingredients:
    • 6 slices of bacon
    • 3 eggs
    • 1 head iceberg lettuce
    • 3 cups cooked, chopped chicken {we BBQ'd two boneless skinless breasts}
    • 2 tomatoes
    • 3/4 cup blue cheese, crumbled {I just used plain cheddar cause I didn't want to go to the store}
    • 1 avocado
    • 3 green onions, chopped {and... I subbed a few slices of red onion}
    • Ranch dressing
    Directions:
    1. Place eggs in a saucepan and cover completely with cold water. Bring water to a boil. Cover, remove from heat, and let eggs stand in hot water for 10 to 12 minutes. Remove from hot water, cool, peel and chop.
    2. Place bacon in a large, deep skillet. Cook over medium high heat until evenly brown. Drain, crumble and set aside.
    3. Divide shredded lettuce among individual plates.
    4. Evenly divide and arrange chicken, eggs, tomatoes, blue cheese, bacon, avocado and green onions in a row on top of the lettuce.       
    5. Drizzle with ranch dressing {or your other favorite} and enjoy.  
    Tonight I wasn't feeling wine {weird right?!} but I am enjoying a sweet tea vodka... did you know they make sweet tea flavored vodka? Paired with some sweet tea and a splash of lemonade... deeeelish! :)

    Cheers!
    ~Vino Vixen~

    Sunday, May 15, 2011

    Panera's Cream Cheese Potato Soup

    This is seriously an awesome knockoff of the real thing.  I originally got the recipe from Food.com.  The first time I made it, I happened to go to Panera that very weekend and have their soup.  The only difference was that mine had a little more spicy kick to it due to a few more crushed red pepper flakes.  Other then that, this one is like the real thing.


    Panera's Cream Cheese Potato Soup


    Ingredients:

    • 4 cups of low fat/low sodium chicken broth
    • 4 cups of peeled and cubed red potatoes
    • 1/4 cup of minced red onion
    • 1/2 tsp of seasoning salt
    • 1/4 tsp white or black pepper
    • 1/4 tsp of crushed red pepper flakes
    • 1 (8oz) package of Neufchatel cheese or light cream cheese

    Directions:
    1. Combine broth, potatoes, onion and spices.  Boil on medium-high heat until potatoes are tender. 
    2. Smash a few potatoes to release their starch for thickening.
    3. Reduce to low heat and slow add cubed cheese.  Stir until melted. 
    4. Serve it up while it's hot with any toppings you wish!
    Enjoy!

    ~Chef Val

    Monday, May 9, 2011

    BBQ'd Kebabs

    Everyone knows how to make kebabs right? I dunno about that. I love me some grilled veggies though and throw in some pineapple? 

    ::::drool::::

    These are pretty easy and straightforward - the hardest/most tedious part is skewing them but they are so worth it! Hope you enjoy!!!


    Ingredients:
    • 1-2 lbs sirloin or cut of your choice
    • 1 green bell pepper
    • 1 red bell pepper
    • 1/2 red onion
    • 1/2 yellow onion
    • 1 package whole mushrooms
    • 1/4 fresh pineapple
    • Teriyaki marinade of your choice (I use Soy Vay Hoisin Garlic Asian Glaze & Marinade)
    • 1/4 cup A-1 Steak sauce
    • dash Tabasco
    • 1 clove garlic, minced
    Directions:
    1. If using wood skewers, soak them in water while preparing your ingredients.
    2. Cube all fresh ingredients (except mushrooms) to the desired size - I prefer mine rather large so I use 1-2 inch pieces.
    3. Place fresh ingredients in a large bowl - cover with marinade, A-1, Tabasco and garlic.
    4. Mix well and let sit for at least 1 hr. 
    5. Place all ingredients on the skewers, alternating until all ingredients have been used. 
    6. Grill over medium heat until cooked through - rotating and basting with remaining marinade frequently as to not burn. 
    These Kebabs are fabulous paired with a glass of this:


    Enjoy!
    ~Vino Vixen~

    Thursday, May 5, 2011

    Sesame Tilapia

    I'm always on the hunt for quick and easy dinner ideas, that don't break the bank.  This one is originally from Allrecipes.  Tilapia is usually about $3/lb at Costco, and when paired with some minute rice, or even Steamfresh veggies, this can be a tasty dinner for 2 people, for about $4 total.  Not bad!  I like to top the fish with sesame seeds before putting it in the oven.  I also remove the remaining sauce (once the fish is cooked), and reduce it down a bit to create a nice thick sauce for veggies or rice.


    Ingredients
    • 2 tablespoons orange juice
    • 2 tablespoons soy sauce
    • 2 tablespoons sesame oil
    • 1/2 teaspoon white sugar
    • 1/2 teaspoon minced garlic
    • 1/4 teaspoon ground ginger
    • 2 Tilapia filets
    Directions
    1. Stir the orange juice, soy sauce, sesame oil, sugar, garlic, and ginger in a 9x13 inch baking dish until combined. Add the tilapia fillets, turning once to evenly coat. Cover the dish with plastic wrap, and marinate in the refrigerator at least 30 minutes.
    2. Preheat an oven to 425 degrees F (220 degrees C).
    3. Remove the plastic wrap, and bake in the preheated oven until the fish flakes easily with a fork, 9 to 11 minutes.

    - Pastry Princess


    Tuesday, May 3, 2011

    Root Beer Float Ice Cream

    The base of this ice cream is Alton Brown's recipe, I just added the root beer concentrate.  It is super easy to make, delicious, and tastes just like a root beer float!  We always make this for BBQs in the Summer.

    Ingredients
    • 9 ounces sugar
    • 8 egg yolks
    • 3 cups 1/2 & 1/2
    • 1 Tbsp root beer concentrate
    • 1 cup heavy cream
    Directions
    1. Over medium heat, bring the cream and 1/2 & 1/2 just barely to a simmer.

    2. Meanwhile, whisk the egg yolks until they're light and creamy. Slowly whisk in the sugar until light and THICK. You want the mixture to fall from the whisk slowly and sort of clump when it reaches the bowl. If it's runny, keep whisking. It takes a while to get it to the right consistency.

    3. Slowly add 1/3 of the cream into the eggs while whisking constantly. Once that's mixed and the eggs are tempered, slowly add the remaining cream into the eggs and whisk to combine. Add in the root beer concentrate and stir until thoroughly mixed.

    4. Return cream/egg mixture to the heat, and stir on medium low until it reaches 170 degrees. Move mixture to a metal bowl and cool in sink filled with cold water. Once mixture reaches room temperature, refrigerate to 40 degrees.

    5. Add mixture to ice cream machine and follow manufacturer's directions.

    - Pastry Princess

    Sunday, May 1, 2011

    Black Bottom Cupcakes

    These are the cupcakes that caught my husband. Shortly after we started dating, he took me to hear the National Symphony Orchestra play in the amphitheater in Rock Creek Park. I made these to take with us and that was all she wrote. My husband shared the leftover cupcakes with his sister and brother-in-law, and they told him not to let me get away.

    Black Bottom Cupcakes

    Batter:
    1 2/3 c. flour
    1 c. sugar
    1/4 c. cocoa powder
    1 t. soda
    1 t. salt
    1 c. water
    1 T. vinegar
    1/2 c. oil
    1 t. vanilla

    Filling:
    8 oz. cream cheese
    1 egg
    1/3 c. plus 2 T. sugar
    1/8 t. salt
    6 oz. chocolate chips

    In a medium sized bowl, combine all the ingredients for the batter and mix until combined.


    In a smaller bowl, combine all the ingredients for the filling, except the chocolate chips. Beat until smooth. Fold in chips.
    For regular sized cupcakes, add 1/4 to 1/3 cup of batter to each cup. Then add a heaping tablespoon of the filling to each cup. Do not overfill, or you will never get them out of the muffin tin. You can also make minis with a tablespoon of batter and a teaspoon of filling.


    Bake at 350 degrees for 18 to 20 minutes or until toothpick comes out clean.

    Sunday, April 24, 2011

    Easy Blueberry Cobbler

    I make dessert each week to take to my sister-in-law's house for Sunday dinner. This week, I made my favorite blueberry cobbler, using blueberries that I froze last year. About this time of year, blueberries go on sale frequently here, so I put a bunch in the freezer for later. Sadly, we ate it all before I got a picture.

    Easy Blueberry Cobbler

    3/4 stick of butter
    1 c. sugar
    1 c. flour
    2 t. baking powder
    1/2 t. salt
    3/4 c. milk
    2 c. blueberries with 1/2 c. sugar

    Melt the butter in a deep baking bowl or dish (I use my largest Pyrex mixing bowl). Make a batter of 1 c. sugar, flour, baking powder, salt and milk. Pour batter into the middle of the butter. Do not stir. Toss the blueberries with 1/2 c. sugar and add to the middle of the batter. Do not stir. Bake one hour at 350, or until crust is done (it took about 1 1/2 hours today). The crust will rise to the top.

    Delicious warm with a scoop of ice cream, but it also makes a fantastic breakfast as a cold leftover.

    Friday, April 22, 2011

    Wet Burritos

    These were another hit in our household! I was a little leery of making these because they seemed like they contained a lot of ingredients! But they were really easy once I got going. My hubby thought the Chili was a weird addition too but it worked very well - yum! I hope you enjoy as much as we did!


    Ingredients:
    • 1 pound ground beef
    • 1/2 cup chopped onion
    • 1 clove garlic, minced
    • 1/2 teaspoon cumin
    • 1/4 teaspoon salt
    • 1/8 teaspoon pepper
    • 1 (4.5 ounce) can diced green chile
    • peppers
    • 1 (16 ounce) can refried beans
    • 1 (15 ounce) can chili without beans
    • 1 (10.75 ounce) can condensed tomato
    • soup
    • 1 (10 ounce) can enchilada sauce
    • 6 (12 inch) flour tortillas, warmed
    • 2 cups shredded lettuce
    • 1 cup chopped tomatoes
    • 2 cups shredded Mexican blend cheese
    • 1/2 cup chopped green onions
     Directions:
    1. Crumble ground beef into a skillet over medium-high heat. Cook and stir until evenly browned. Add onion, and cook until translucent. Drain grease, and season with garlic, cumin, salt and pepper. Stir in the green chilies and refried beans until well blended. Turn off heat, but keep warm.
    2. In a saucepan, combine the chili without beans, tomato soup and enchilada sauce. Mix well, and cook over medium heat until heated through. Turn off heat and keep warm.
    3. Place a warmed tortilla on a plate, and spoon a generous 1/2 cup of the ground beef mixture onto the center. Top with lettuce and tomato to your liking. Roll up tortilla over the filling. Spoon a generous amount of the sauce over the top, and sprinkle with cheese and green onions. Heat in the microwave for 30 seconds, or until cheese is melted. Repeat with remaining tortillas.
    I didn't end by melting the cheese in the microwave - I try to use it as little as possible - so we just heated them in the oven. Also, we didn't really want to put the lettuce or tomato inside the burrito so after the cheese was melted we just put it on top. I found this recipe on Allrecipes.com and they suggest a Zinfandel - I'll take a Margarita tonight thankyouverymuch! :)

    Cheers!
    ~Vino Vixen~

    Saturday, April 16, 2011

    Creamy Burrito Casserole: A Smash Hit!

    After a couple GP ladies tried this off of my own blog and raved about it, I knew I had to put it on here.  It's really easy, and so yummy.  Definitely the perfect comfort food.   It doesn't really look pretty, so I apologize for that, but you have to try it to know it's wonderfulness.


    I originally got this recipe off of Food.com.   You can find it here.  As always, I've adapted it a bit to suit our own taste and to try and cut a few calories from this otherwise caloric monster.  Sometimes those calories are worth it though.   Here are the ingredients I use....otherwise the directions are the same from Food.com.

    Ingredients
    1lb of lean ground beef
    1 small red onion (more flavor!)
    1 package of taco seasoning
    1 package of Mission Fat Free Heart Healthy Whole Wheat Tortillas (that was a mouthful)
    1 can fat free refried beans (or make your own!)
    2-3 cups of shredded cheddar cheese
    1 can Fit and Active Cream of Mushroom Soup
    1/2 cup of light sour cream

    Enjoy!

    -Chef Val

    Thursday, April 14, 2011

    Cranberry Pork

    This is my brother-in-law's recipe that he makes every year for Christmas Day lunch.  It's super easy to make and very tender!  


    Ingredients

    • 1 16oz can of cranberry jelly
    • 3 T of fresh lemon or orange juice (I prefer orange)
    • 4 T of dijon mustard
    • 3 T of brown sugar
    • 2 pounds pork tenderloins
    Directions
    1. Mix all ingredients, through brown sugar, to form a sauce. Place pork tenderloins in slow cooker and cover with sauce.
    2. Cook on low for 8-10 hrs, or high 4-5 hrs
    3. Add potatoes and carrots, if desired, about 3 hours into cooking process. I also quartered an onion and threw that in the crockpot for some more flavor.